

Forum Replies Created
-
AuthorPosts
-
December 10, 2018 at 2:07 AM #875424
can't be sure as all the ones I thought #2 might be don't quite look the same
but the closest I got based on the other promo images (that seem to be the same girl but different angles) is P3D Mylou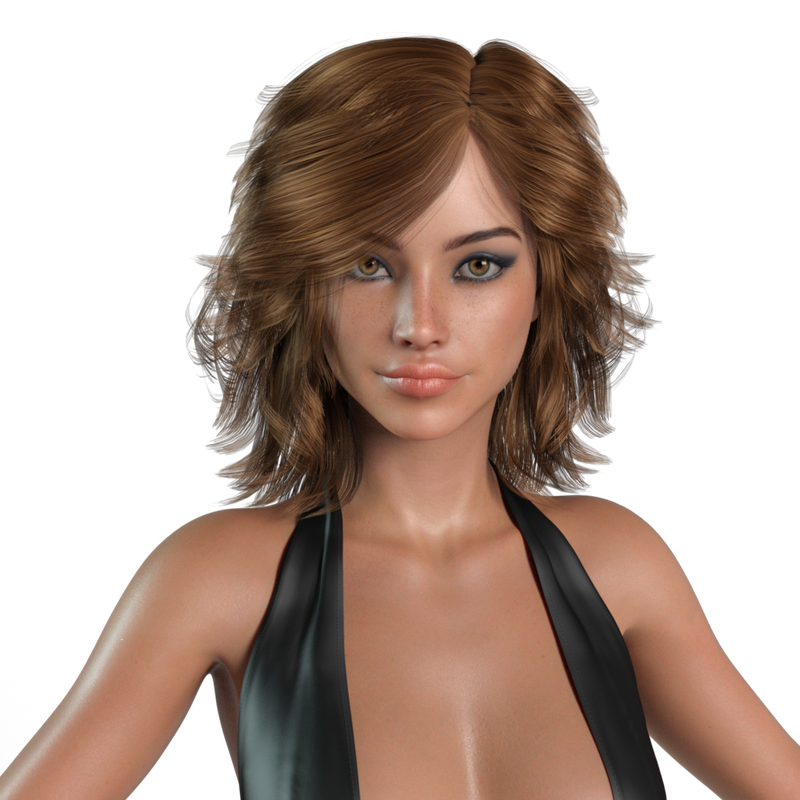 December 9, 2018 at 11:47 PM #875309
ok so this a pretty late reply/update to this
@soeperman as Evilmonkey mentioned your image is not the right size for
an A4 (you are using 1080p at the moment)
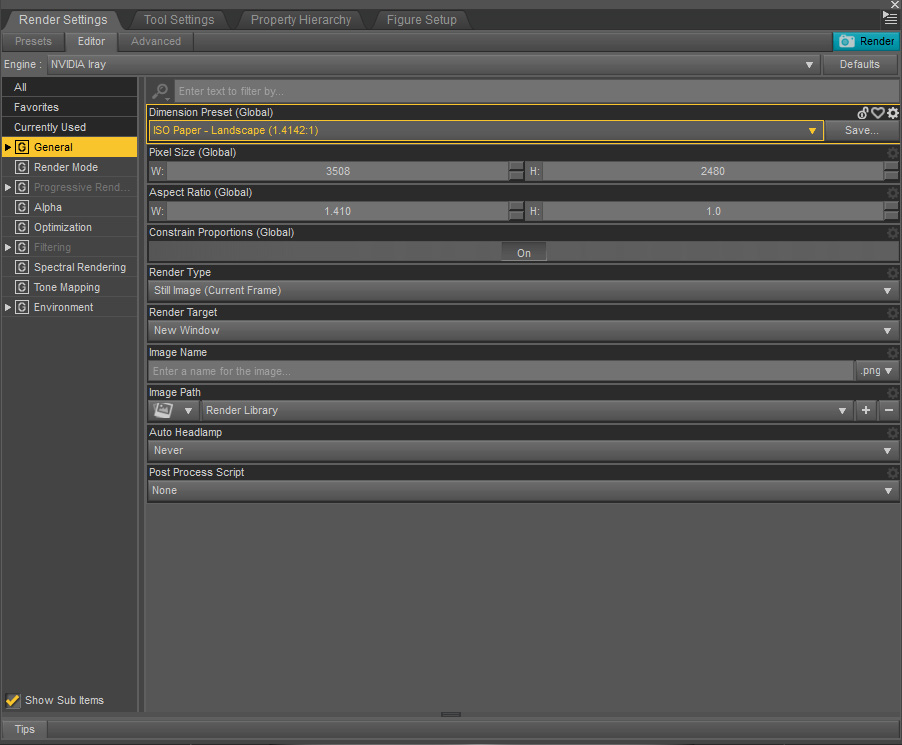
in Daz studio on the render settings pane, under General
click the dimension Preset (global) drop down
and choose ISO Paper - Landscape(1.4142:1)
set your width to either 3508 or 1754, render your image again
with these settings and then follow the same windows 10 printer steps from before.
this should work as you wanted.-Edit-
For good Measure here is a screenshot of the render settings tab:
 December 4, 2018 at 12:07 AM #867609
sounds like a scaling or rotation issue on the printer, if you are using windows 10 then if you right click on your .jpg or .png or whatever saved image and choose print you should get something like this:
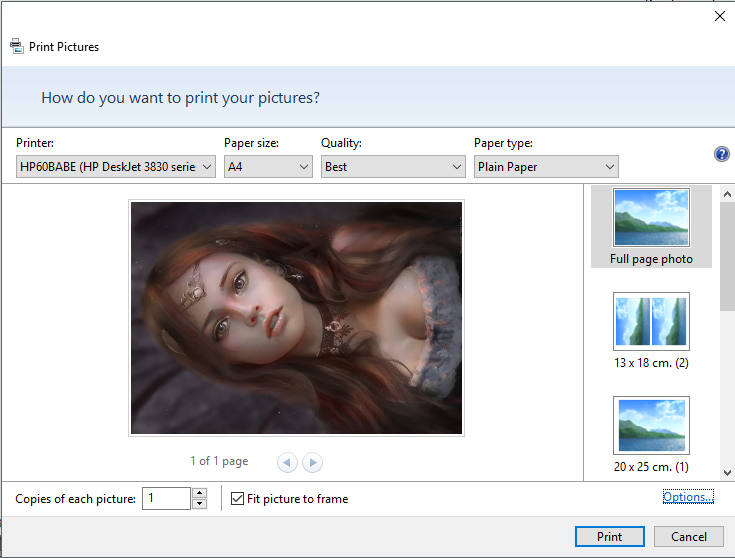
then make sure you choose full page photo and check the box at the bottom for fit picture to frame.
this is assuming a home printer which usually can't print to the edges anyway.
if this is for professional printing, then first print your image to pdf or make it into an A4 pdf some other way, pdf will have less problems when printing the final version.November 14, 2018 at 10:22 PM #843107I'm late to this party
cpu intel i5 4670 (left optix prime acceleration on) 7 min 25 s (414 iterations)
GPU Nvidia gtx 970 (gigabyte oc windforce 3 edition) 32.78 seconds (418 iterations)November 13, 2018 at 6:12 PM #841663under render settings, filtering
there's an option for post denoising for iray,
"Post Denoiser Available" -> set to on
and then
"Post Denoiser Enable" -> set that to on too
also it appears to be gpu onlyNovember 13, 2018 at 12:45 PM #841343I've played around with it, the render times can vary, but if you are able to use it the new ai denoiser reduces the time to a clean render by quite a lot (I havent run any actual timers on anything).
also quality of life change, primitives will create with default material of current renderer, so Iray if thats what you're using.October 29, 2018 at 5:12 PM #821476nothing, its like the rest of the mgid click bait.
I've seen the top one once, which supposedly wants you to
try this one thing and never need viagra again.
like the pictures of some fruit or other, telling you to eat this one
thing and never suffer health issues, or lose weight/ gain muscle.October 29, 2018 at 12:04 PM #821137yea looking pretty decent so far. keep us updated on progress if you continue with this.
(assuming IRAY uber base past this point)
for the skin you can also adjust the settings under glossy roughness and reflectivity (if base mixing is set to metalicity/roughness) or glossy specular and glossyness (base mixing specularity/glossyness)to get that sort of light glow to the skin where light strikes through an edge (like when you shine a torch through your hand you get that red colour)
add a small amount of translucency and try the setting with scatter and transmit,
best results when you also have sub surface settings on further down (thin walled off)
I don't have any solid advice on what colours/levels of the settings to use though as their interplay can be a bit strange sometimes (play around until you like it)looking at skins other people have made and turning settings on/off or tweaking them is also a pretty good way to figure out what sort of effect they have on the skin shader.
June 22, 2018 at 5:32 AM #650347it's effectively an entire site sale but is specifically any item on any wishlist is 50% for everyone
April 8, 2018 at 11:42 PM #563227well you get to laugh at my poorly done light sabre 🙂

used daz primitives with a short trip through some quick and dirty zbrush morphing
using double emmisives and bloom for the blade
I'll probably work on making a proper handle and blade at some point.April 8, 2018 at 10:07 PM #563131I wonder if the others are using the same daz version ? because I didn't find proper UV's in most of the obj files included either but maybe I did something wrong/missed something. either way I started the process of remapping the items and converting them to daz props but that'll probably take me a while.
April 8, 2018 at 10:01 PM #563126I haven't seen any in depth dforce tutorials but there are a few basics for things like weight mapping floating around. if you've played with cloth physics before, a fair bit translates. for the most part it appears to be pretty much trial and error on a per simulated item basis. if you can find actual information on the differences between stretch, shear, bending and buckling it would help, from what I can tell stretch is simply elongation of the distance between 2 vertices, shear is the angular movement of a corner of a quad making it go diamond shaped or vice versa, bending takes a line between two vertices as a hinge and buckling moves a vertex around the line between two corners.
If you want an item to be tight stretchy material reducing the contraction expansion ratio a little works, too much and things tend to explode, also avoid having internal clipping in a model if possible.
if anyone finds a good tutorial I'd be interested too, and if anyone wants I could probably put together a video of some dforce sims and settings to try show their effects.
April 8, 2018 at 9:38 PM #563094probably means the muscles need morphing in the thigh and calf as it stands
it looks like they sort of just clip into each other, but awesome renders they're all looking pretty damn good. the rocket one reminds me of jinx from league of legends just more retro future sci fi and less punk 🙂April 8, 2018 at 9:21 PM #563069signing up for re-listing
EDIT: you're now added to the list!
April 7, 2018 at 9:43 AM #561042addition to above post, I downloaded it and loaded it up, bridge base only has UV maps for screen tracking so its not just you
-
AuthorPosts

