Home Page › Forums › General Chat › Moody render
Tagged: Rendering for Film Question
- This topic has 18 replies, 10 voices, and was last updated 4 years, 3 months ago by
 Frank21.
-
AuthorPosts
-
June 29, 2022 at 4:04 PM #1825472
Hi Friends
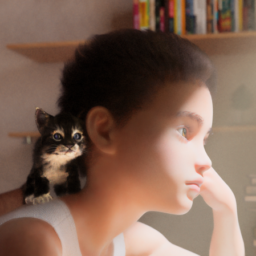
Anyone can help or have suggestions for making moody render like these?
Any lighting trick or LUTs, Presets for PS are welcome 🙂


 June 29, 2022 at 4:59 PM #1825487
I use Nik Collection for many years and no other plugin in PS. Because in my opinion it is the easiest and the most effective plugin with many possibilities. And I am sure you can make smooth and Moody images with it.
Even if your render is crappy, this plugin is a miracle.June 29, 2022 at 9:47 PM #1825564IRadiance - Light Probe HDR Lighting - there is soft and direct light of each EXR.
there appears to be only one expansion pack currently available at zonegfx
https://zonegfx.com/iradiance-light-probe-hdr-lighting-for-iray-expansion-4/I wish there was a more convenient way to de-saturate the hdr light in DAZ/Iray as it is in Blender 🙁
for post processing i recommend Luminar Neo - it has some excellent presets for portraits that can be tweaked and combined to your desire
June 29, 2022 at 10:57 PM #1825587That third one is pretty awesome all by itself, TBT.
June 30, 2022 at 12:02 AM #1825617My most-used portrait guidance is to focus on the camera:
--First, select the camera and make sure that the Focal Distance crosshair plane intersects with one or both of the character's eyes/corneas. Portraits are all about the eyes.
--Second, enable Depth of Field and lower it until it is just past the character's nose. This draws attention to the face by blurring everything else.
These two tweaks are the basics for creating a good close up portrait imo.
June 30, 2022 at 1:28 AM #1825645I like the renders they are too realistic.
Nice work.
I am a Filmmaker, How am I going to apply these in 3D characters for a movie?I will appreciate your advice.
June 30, 2022 at 1:56 AM #1825662Daz Studio can animate but it's certainly not the best or fastest way of making animations. @Jacobjustice. You can export Daz figures via bridges to other progs but that requires some experience and tweaking. Do a search on the Daz forums for advise, or Youtube for tutes.
June 30, 2022 at 3:26 AM #1825669Thanks Very much. I will like to learn from you.
Sometimes I started using the Daz C4D bridge on my Mac but it just stop working one day I tried all my best to make it work still nothing.
June 30, 2022 at 6:23 AM #1825712I won't be able to help you @Jacobjustice. I don't have the patience for even short animations.
June 30, 2022 at 9:15 AM #1825786@jacobjustice
Daz bidges are pretty bad. Normally, since you use Cinema 4d (I have r19 (for compatibility with old plugins) and r25 installed, and use Arnold as the render engine.
I do the animations or retarget motions in Autodesk MotionBuilder, occasionally in Maya. In Daz, I can use the old Alembic exporter in HD5F, or the Sagan (Ogawa format..) Then I import them into C4D with an alembic... (R19 still supports Daz´s HD5F with its material definitions by polygons, which Sagan omits, and you have to do it by hand..., but if I use the HD5F and pass it to Ogawa, it keeps the mapping on r25...)
Another case is the textures... Iray materials are quite annoying to convert. To do this, I use a 3DtoAll plugin called "MaxToC4D" and export the daz model to 3ds Max (with the bridge...), and convert it to V-ray. Then, I export it to C4D and the same plugin transfers it to Arnold perfectly. (Despite having the implicit converter in Arnold, materials with alpha channels or cornea-like transparencies, eyemoisture, etc., translate them poorly.)
It's a long way, but I substitute the alembic materials from the Max->C4D and they are perfect.
In Redshift or Octane, I don't know, since I don't use them.
For ligths, better the Greyscalegorilla´s "Ligth Kit Pro" in C4D or a hdr/exr in Arnold´s "skydome".June 30, 2022 at 9:47 AM #1825795@gelstat
Good on the vignette, though maybe try to bring the gamma down a bunch, and ease up on Crush Blacks and Burn Highlights at the same time. That'll compress the contrast range right in the render, while keeping the overall image from being too hot, or too black in the dark spots.Of course, post work never hurts, but it's sometimes very helpful to have a big head-start in the right direction.
June 30, 2022 at 11:49 AM #1825872Olympia20 is really impressive. His renders are excellent.
I made a quick render after reading this thread. I'm not trying to compete lol, but if anyone has advice I welcome it.
My post is next door in the art forum
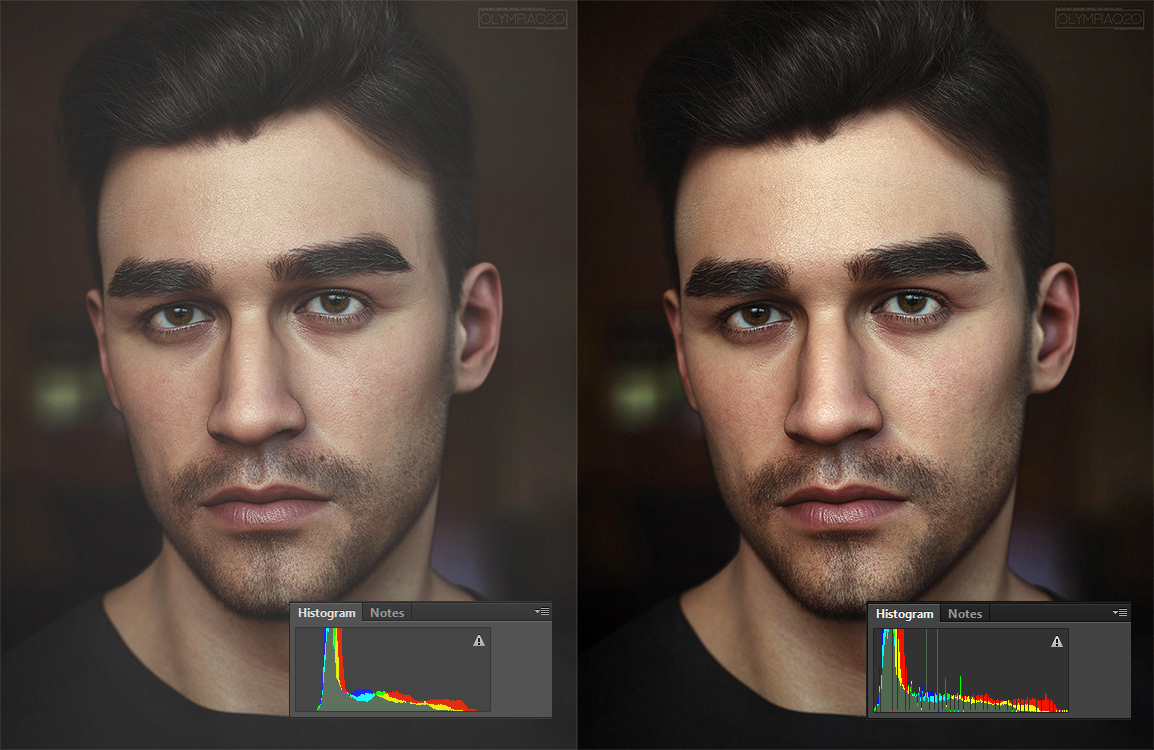
June 30, 2022 at 12:25 PM #1825890there's no magic to achieve this sort of look, to get this milky touch in your renders just use a exposure adjustment layer in photoshop and play with the offset. for the rendering itself use a small light in the front, slightly from above and some weaker from the sides with slightly different colors to make it look more natural (think of a natural environment, sun light is yellowish, the sky is blueish, nature is brown and green). it's not that difficult and the exposure offset is a well known trick to make them look more interesting than they really are. photographers do this all the time ...
June 30, 2022 at 1:38 PM #1825918no, undersizing doesn't do the same, this way you just loose detail. it's about compressing the dynamic range and that's what the exposure adjustment can do in photoshop. look at the histogram ...
 June 30, 2022 at 2:33 PM #1825939
@gelstat
Hey, I see you lost the hard light. The samples all have diffuse area lights, as you can see in the eye reflections. This one seems still a bit saturated, but the contrast/gamma looks a lot nicer.Another trick is to use something like Lightroom to grade the samples and come up with a target profile that can be reached with postwork.
-
AuthorPosts












- You must be logged in to reply to this topic.
