Home Page › Forums › General Chat › Lighting in Daz (mistakes we learn from)
- This topic has 17 replies, 4 voices, and was last updated 6 years, 7 months ago by
 deafx.
-
AuthorPosts
-
September 22, 2017 at 10:31 am #340893
As soon as I create exterior lighting environment, the interior becomes pitch black. So I add lots of lighting points and distant stuff inside but the interior scene remains black and I wanted to create a streaking light coming through the window and bathing the character on her chair but to no avail. A whole day of rendering and changing camera placements and external lighting and the only external environment that seemed to work for me was the Dry Mud Desert one but not enough. I wanted something like this (https://www.wikiart.org/en/edward-hopper/sunlights-in-cafeteria) but the mistake I made was that i didn't activate the camera lamp to ON instead of AUTO in the camera parameters and as soon as I did activate the camera's Lamp; everything changed and I was able to tweak the rest...
September 22, 2017 at 7:19 pm #341235September 22, 2017 at 8:23 pm #341268Don't use camera lamps! Although that technically works, the light is parallel to the lens and it's never (or let's say, rarely) a good idea. It doesn't look natural... You never (or very rarely) see that in photography (and what applies to photography applies to still 3D rendering as far as lighting goes... and much more). Assuming you're using iRay, use an HDRI for external lighting, make sure the dome orientation fits your need (or use the sun node) then use primitives (sphere or plane) with the emission property... and place them to light your model from the side. You'll get much better renders... with some practice! Learn to light! 😉
September 22, 2017 at 8:25 pm #341270Image is so small I can't see anything.
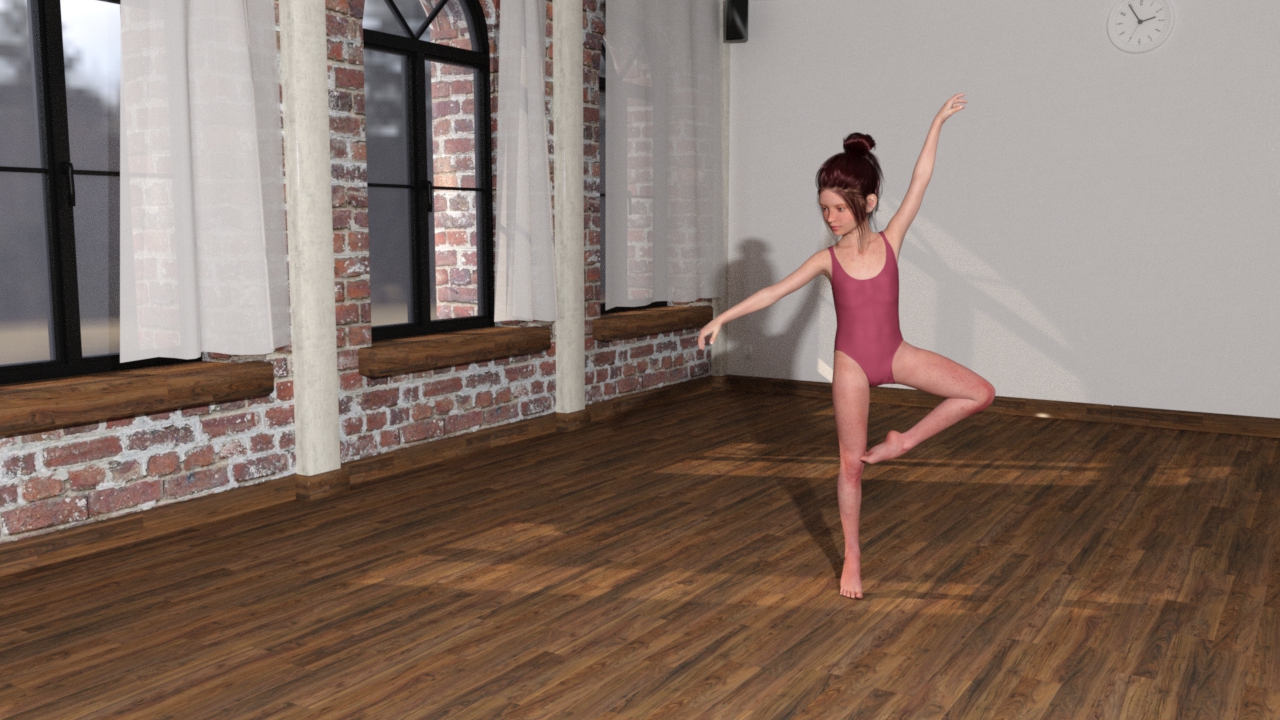
September 22, 2017 at 10:02 pm #341339Just to illustrate my suggestion...

This is a very simple lighting setup with only 1K HDRI for the outside and a iRay "emissive" sphere on the right of the camera...
September 22, 2017 at 10:23 pm #341356@Deafx
You can move the camera lamp up, down, and to either side to get the light where you want it, you can also change the light intensity. Making it much more versatile than you seem to think.
September 23, 2017 at 12:29 am #341434Yet I still don't see why you would use this and not use emissive lights... What you describe looks like what we use to do with our strobes... Move them higher and/or to the side of the camera. That worked for a quick shot or for when we wanted so stay mobile. Yet any of us would have killed to have the freedom we have in a virtual environment... and put our lights wherever we want with a few clicks, using flood lights and modifiers... as we did in a studio for usually a lot of money. But... Yes.... you can do as you described if you want. I just think there's more freedom without the camera light... 😉
September 23, 2017 at 12:54 am #341448But since I usually try not to be close minded... I tried a render on the same scene with the camera light (and of course moved it to the right). Although I totally expected the result.... it's not bad... and even though I expected the render to be faster because of the directional light, I didn't expect it to be THAT fast. My previous render with the emissive sphere creates a flood light that bounces everywhere... It's great and you don't end up with hard shadows... But it takes a lot of time to render. Therefore, the camera light could be an option sometimes. I would like to compare that with a single sided emisssive plane in place of the camera light... I'll try that later. 🙂
September 23, 2017 at 12:55 am #341449Ho, and here's the render
 September 23, 2017 at 3:25 am #341552
So out of curiosity I did a third render with a single sided emissive plane and here's the result.
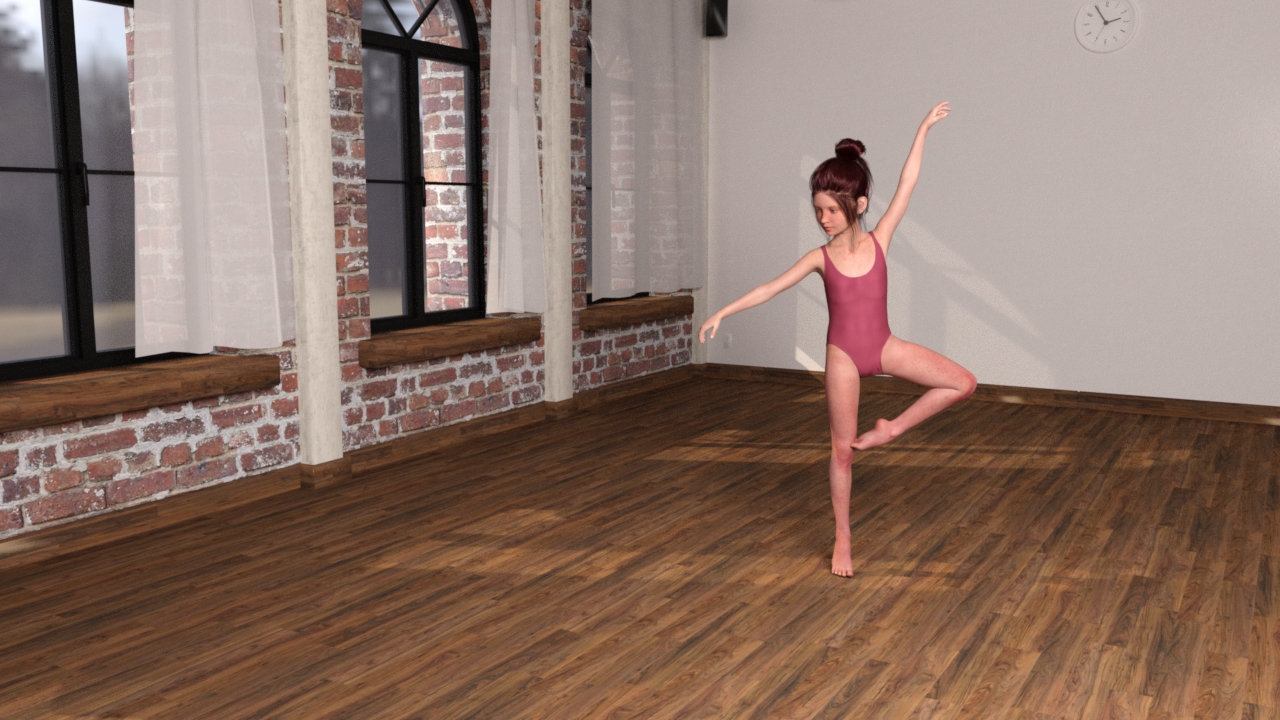
Render time is a bit longer than with the camera lamp, but a LOT faster than with the sphere.... aaaaaand you don't end up with a hard shadow. Looks like the light is more diffuse, probably because the plane was 1mX1m, and the camera lamp (simulating a strobe I guess) is probably much smaller, intense and focused.
That was an interesting test.. I'll use more planes and less spheres from now on! 🙂
September 23, 2017 at 10:22 am #341801Deafx, great ideas that I need to practice on...I liked the first render, 1k HDRI lighting set up as I can see the sun bouncing on the lower side (rim) of the windows, In the 2nd render zwe can see the girl's shadow as if it were night-time not daytime. I"ll copy down your suggestions and get to work...thank you.
Sparklepants:
I'll post a larger one later on.
Tom: OK I'll see what I can get by moving the lamp...compared to the effect i'm after as I mentioned earlier. I"ll also try to create a 3 point lighting set though when I come to count the lighting environment of many indoor scenes in daz, I"m really surprised by the huge number of point lights I see...September 23, 2017 at 12:19 pm #341914On the second render the shadow comes from the camera lamp. That's definitely not something you want in you renders unless you desire that flash/strobe effect. In a studio we use modifiers on our strobes to eliminate hard shadows like that. Like a big light box or an umbrella... It diffuses the light... I did the same thing in the last render using a 1mX1m plane with emissive properties. The rendering engine is very good at simulating real life light effects.
All 3 renders are using the same 1K HDRI, the only thing I changed is the way I light the subject. Although on the first render I think the Environment Intensity setting was higher than on the 2 other renders, the light coming from outside is brighter. I must have changed it after...
September 24, 2017 at 10:04 am #342763Hi deafx again,
thanks for taking the time and effort, really appreciate it; you say in the studio you/we use modifiers on strobes to eliminate hard shadows..are these also called SOFTBOX(es)? Anyway here's a beginning for me and what I did as you said was I got rid of the default light that is I switched off the Headlamp as it can't really be adjusted much. Then back to pitch black mode...Oh it's dark in here. I created a spotlight then later replaced it by a distant light since this is a rather external scene; I also adjusted the sky and longitude latitude settings in the environment settings. So through the distant light I set the lens; I used it as a camera in the viewport to see the light that there is...Then I tweaked the distant light parameters under Light;
which are 1 area
and 2 photometrics
in area I changed the light geometry to rectangle and increased the width and height to 100 instead of 10 to smoothen out the shadows (the larger the numbers, the softer the shadows and I think this is what I understood in your last comment!!!
then under photo-metrics I had to increase the luminus flux (roughly light intensity I guess) to 50000 then to 100000 and then to 150000 as for the sky it was just a default one
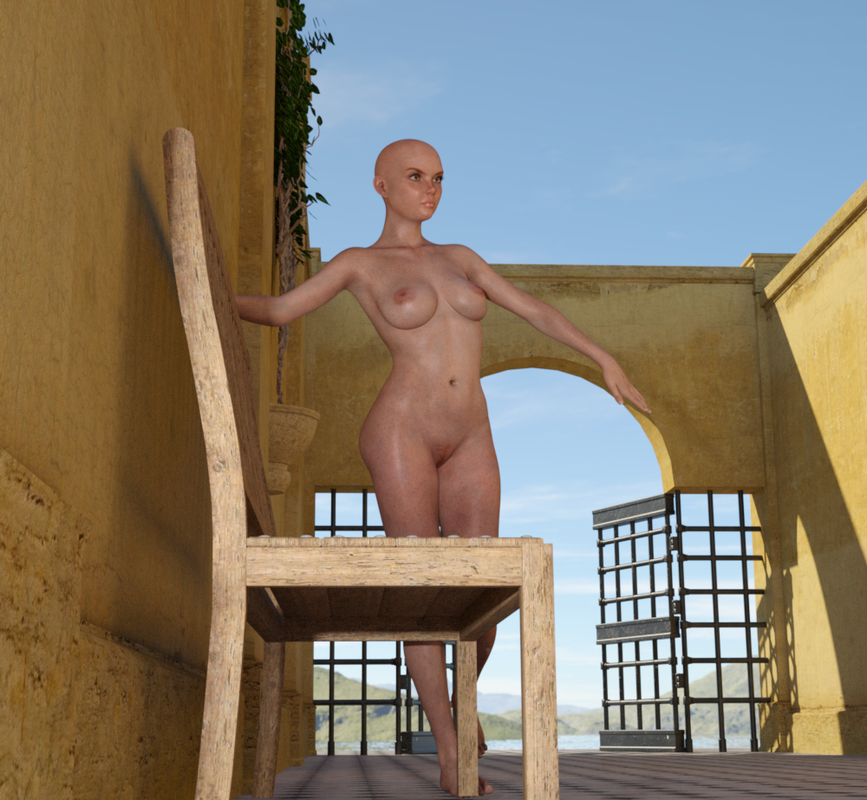 September 24, 2017 at 10:16 am #342773
Here is the same procedure with a spotlight instead of a distant light but I don"t know what happened to the chair texture
 September 24, 2017 at 11:27 am #342842
Yeah you got it, I said "light boxes" but "soft boxes" is a more appropriate term. Sorry, English isn't my native language, sometimes my translation isn't as precise as I'd like! 😉
I don't use photometric lights. But yes, you are right, a big light source will soften the shadows. What is fun in a virtual environment is that you are not limited by anything, you can create gigantic soft boxes that would be mostly impossible in the real world! 🙂
In your last render, I think you got a reflection on the chair. The surface is probably glossy. Just change the angle of your spot to eliminate the reflection.
-
AuthorPosts
 Here is a better result with Delight render instead of iRay

- You must be logged in to reply to this topic.