Home Page › Forums › General Chat › Identifying channel usage in texture maps
- This topic has 16 replies, 5 voices, and was last updated 1 year, 12 months ago by
 mathmathou.
-
AuthorPosts
-
April 20, 2023 at 7:41 am #1959173
Hello all,
This is not a attempt to "hack" a subject of interest, but I'd like to submit to the expertise of @windreaver0118, @abad, @inversekinematics, @littlepleasures and @gts6 (people who know more than me about textures), a somehow similar problem that I am facing.
I have started extracting 3D assets from a game and doing so, I get a 3D model and 3 texture files. I already did that many years ago with EvE Online and the textures were rather straightforward. But those textures in particular are giving me a hard time identifying which layer does what.
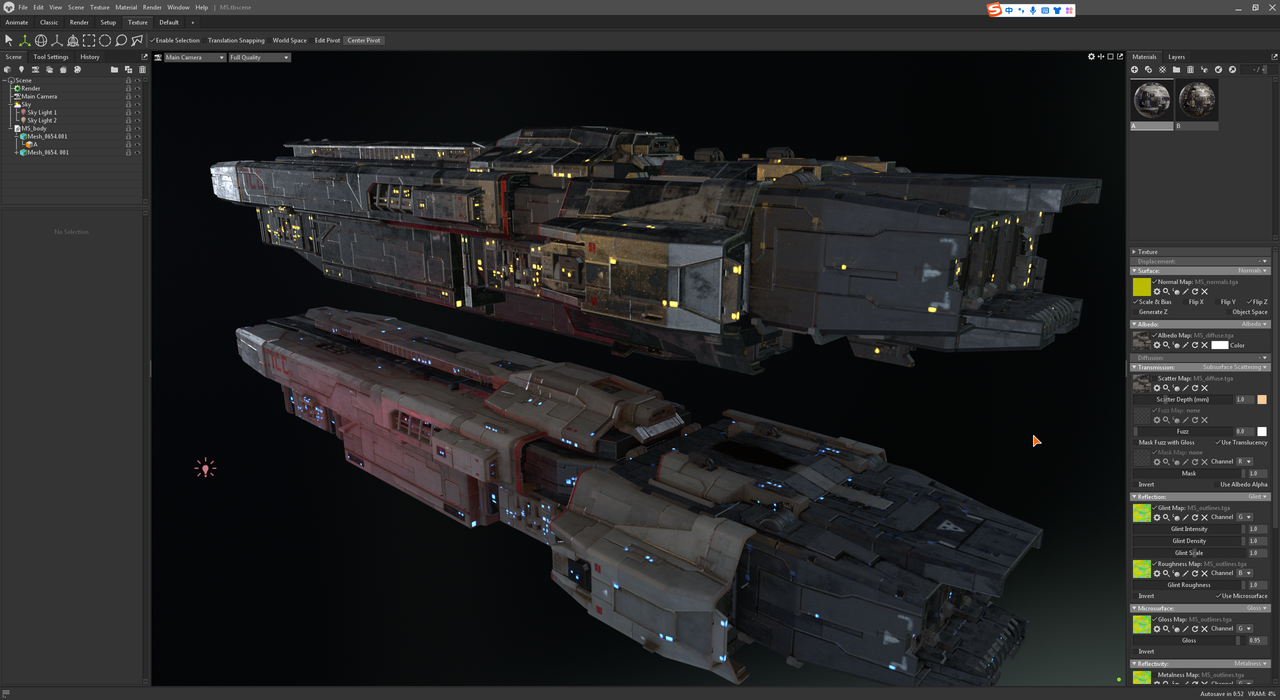
Before going further, I need to precise that those models are spaceship models, that might give you a clue as which texture is use for what. I also want to mention that I use Marmoset Toolbag 4 to setup the textures and render the models, but using Keyshot gives almost the same results (with less freedom, but that is just a personal preference lol)
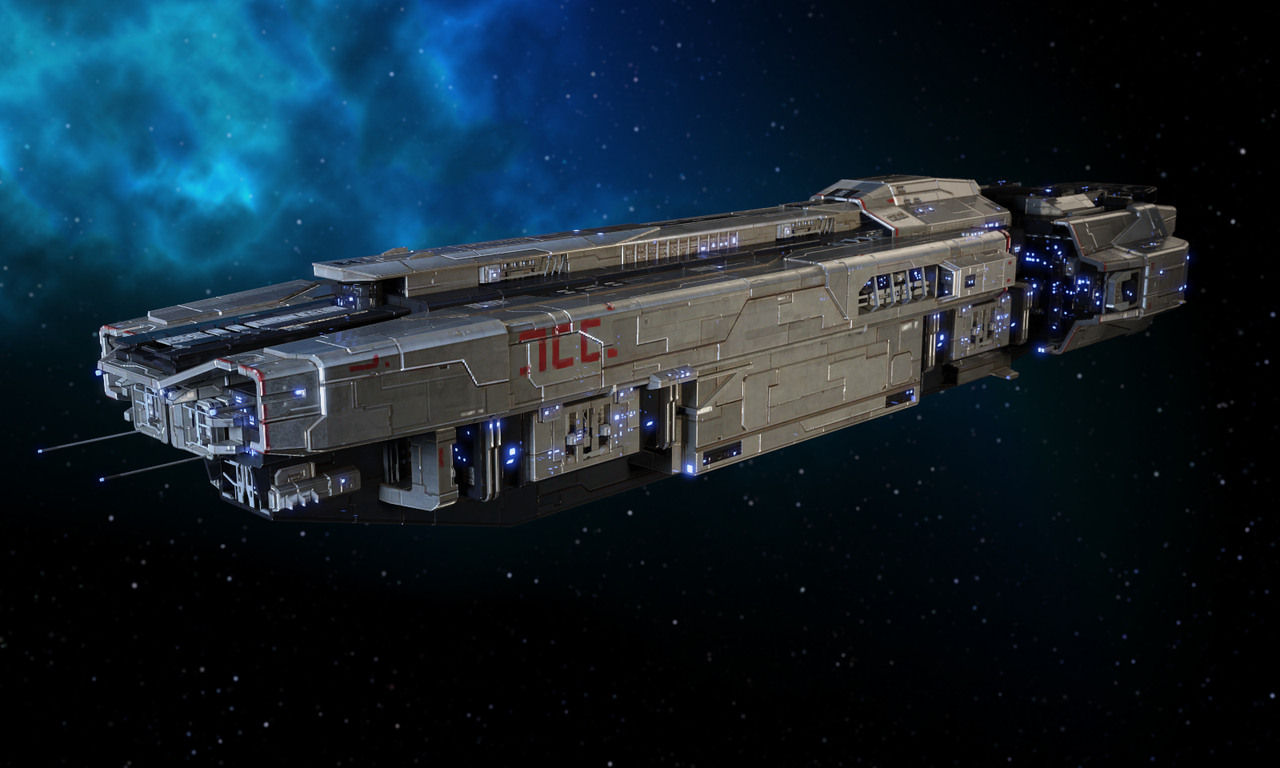
This is a render made using Marmroset toolbag:

As you can see, there is not a lot of specularity in this image, we'll come back to that later.
---------------------------------------------
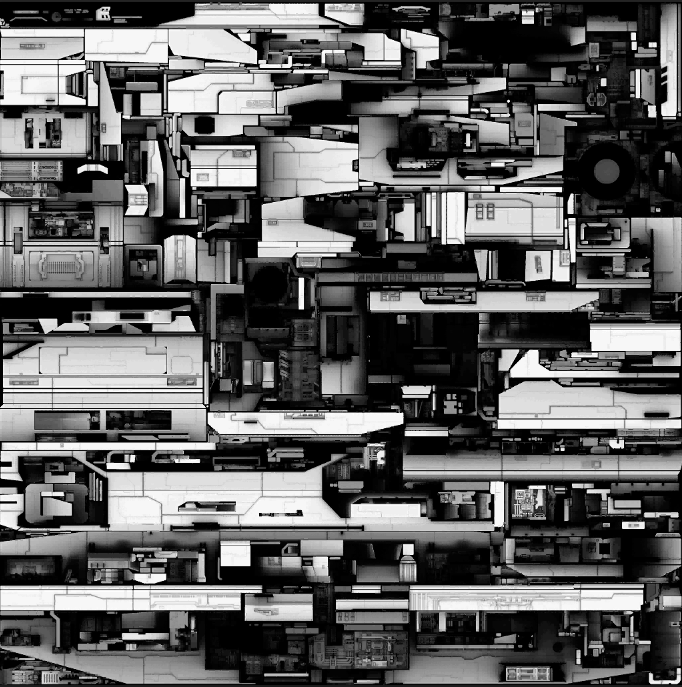
FIRST TEXTURE FILE
The first file can be considered the "diffuse" map, all Red Green and Blue channels combine to give this:
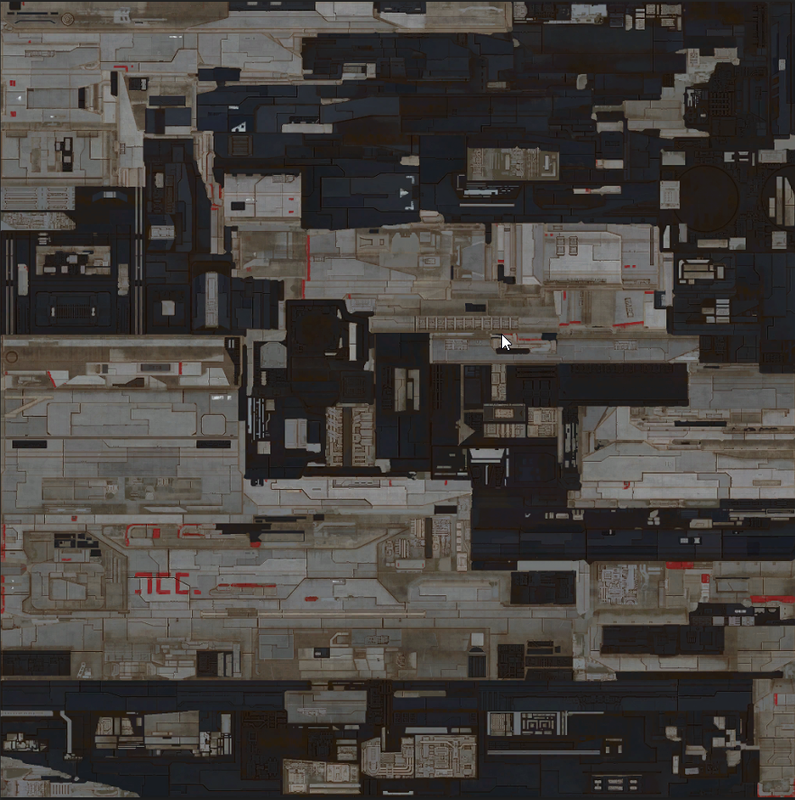
No real problem with this one until you look at the alpha map.
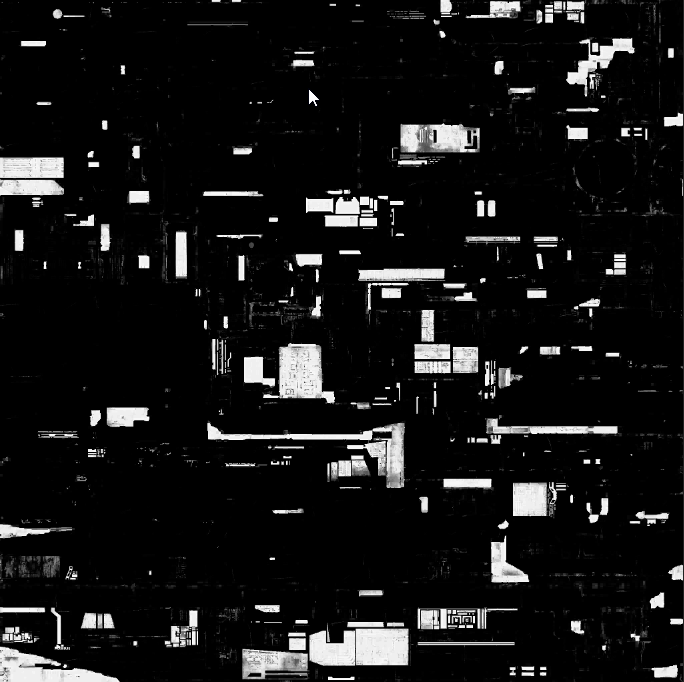
Activated over the RGB channels it gives red tint to some parts of the images like this: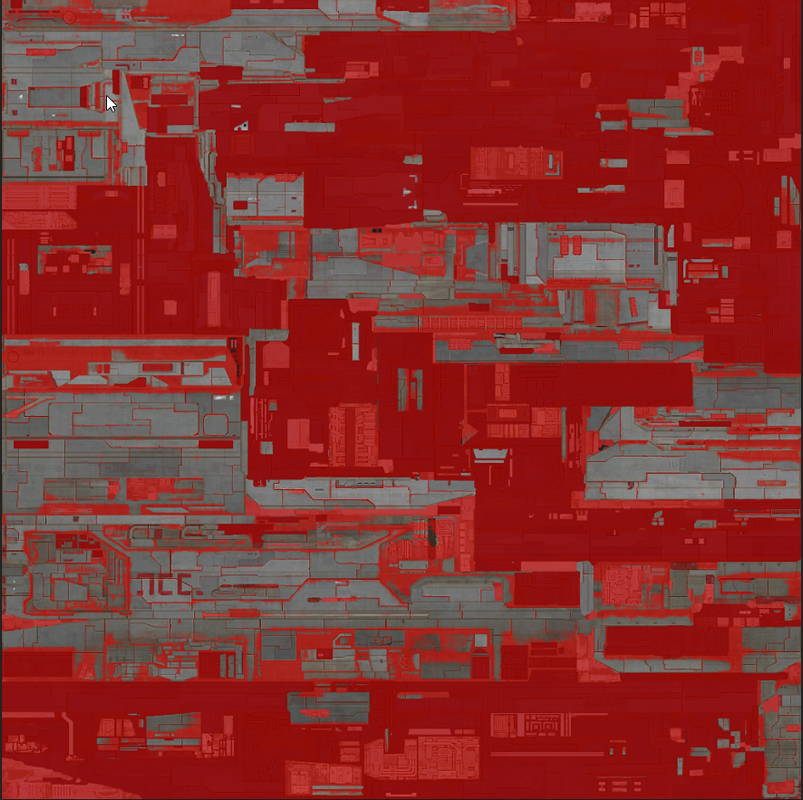
I suspected this layer was to be used separately and, indeed alone, it looks like this:
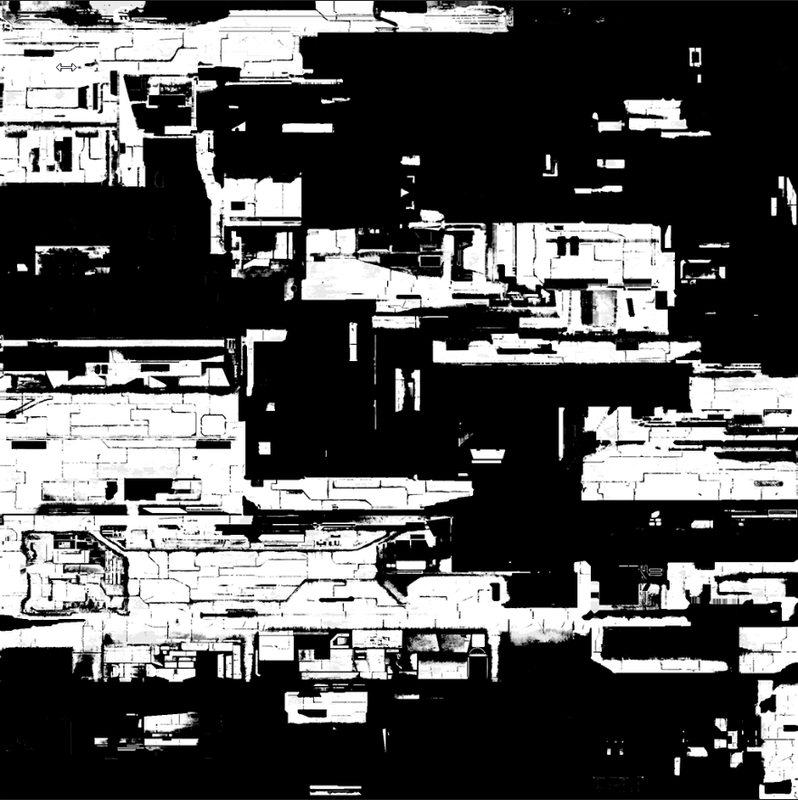
The fact that the contrast of this layer is very pronounced makes me believe it is not a specular map. But if not the specular, what could it be?
SECOND TEXTURE FILE
The second file I usually call "normals" as internal name but... they are not blue

The Red and Green channels combine to give a yellowish color and independently they look grey just light from different angles considering the shadows :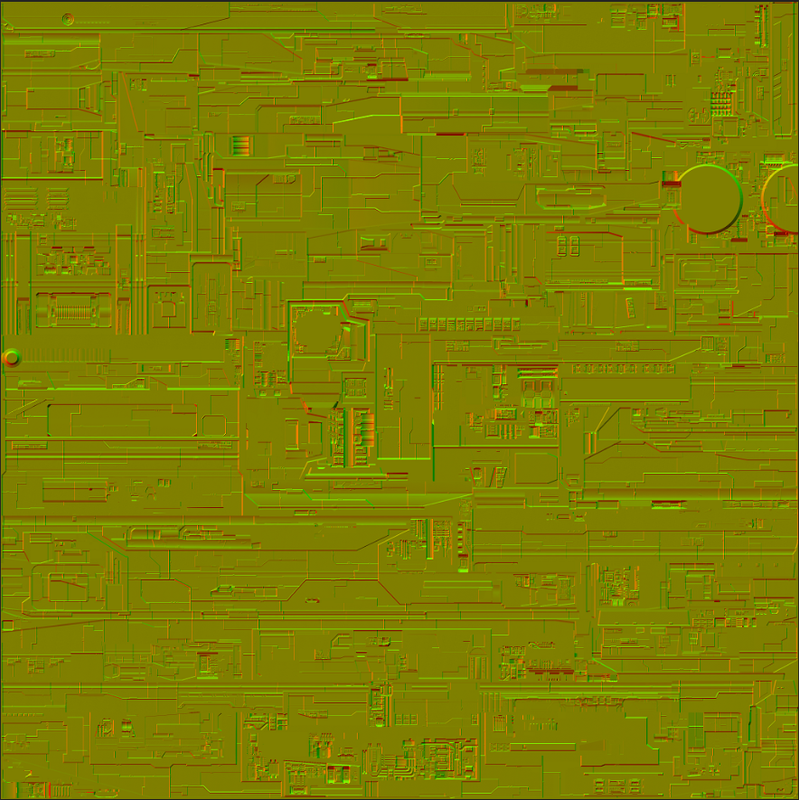
Red channel alone:
Green channel alone:
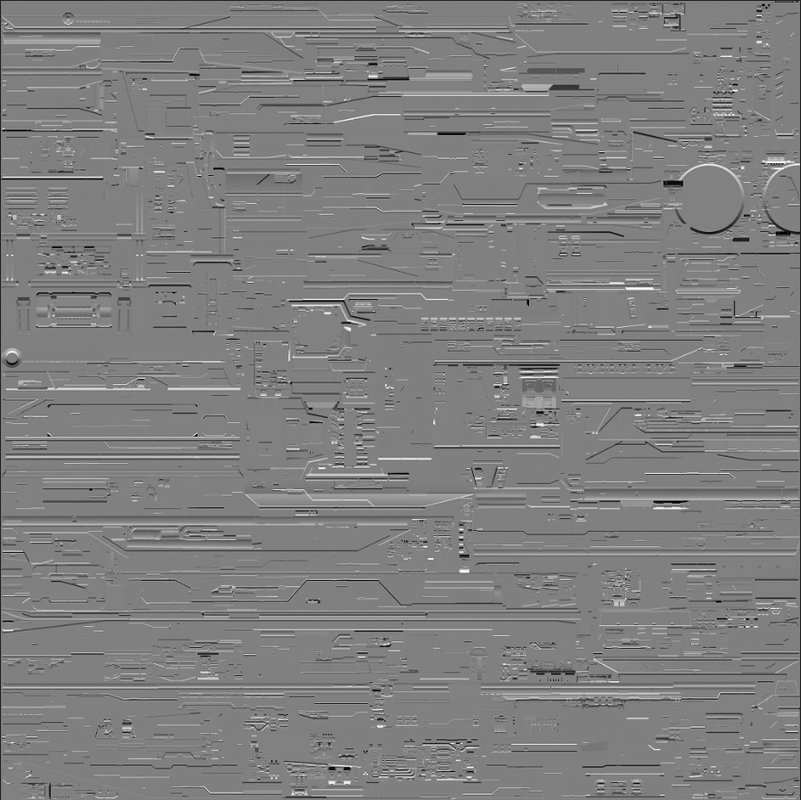
When using the R and G channel in the normal map input, it gives descent results, but I thought normal maps were... blue... Is this some special normal map?
The blue channel alone is black with small white areas that I use in the illumination input and it works well, I think I made no mistake with this one
:
Regarding the alpha channel, I have no clue. The fact that it is white white some light grey areas could indicate that it is some kind of masking map but more than that...

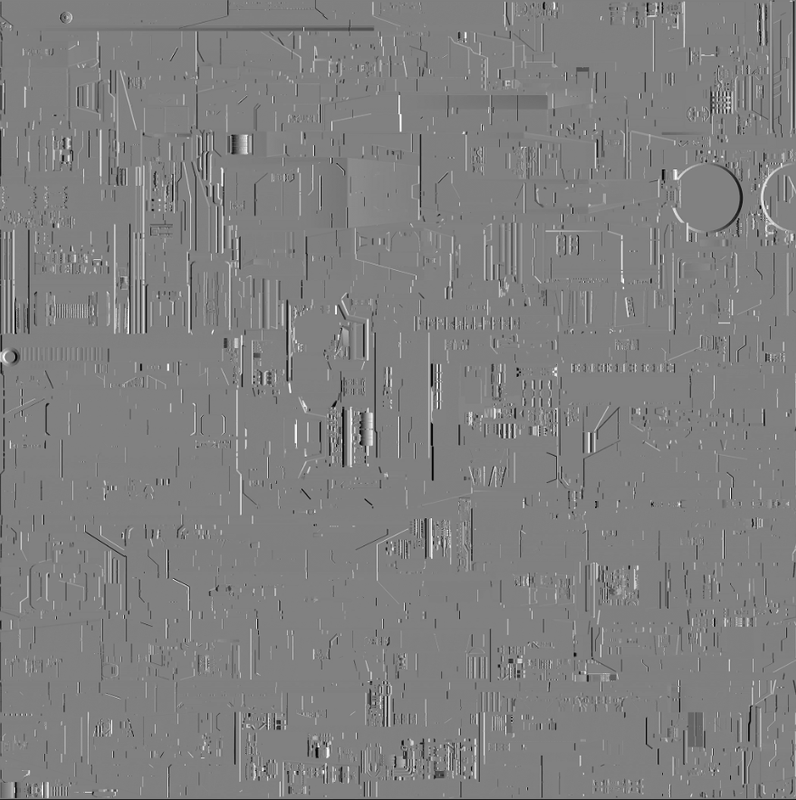
THIRD TEXTURE FILE
This one is a bit tricky, and I'm fairly sure all channel are to be used separately:
Here is the red channel and, using it in the occlusion map input, it gives very good results :
The green channel by its look, could very well be a roughness map, but using it in the roughness input or the specular input gives mediocre results.

Finally the blue channel looks looks like this:
Organized differently but looking very similar to the alpha channel of the first texture map.
Could that be a specular map as well? Something else maybe?There is an alpha channel on this third map, but it's just the outlines of the ship used in game for a specific feature (showing the blueprint of the ship when you don't own it yet).
Anyway, my bad results at render time could very well be me setting up my lighting wrong and not getting specular or roughness. I was just wondering if any of you, familiar with texture maps, could by their look, give me confirmation, hints or corrections about the utility of each of this map channels.
If you made it that far, well thank you very much
Take care all and thanks for any hint you could give me
Math
April 20, 2023 at 2:05 pm #1959312Have a look into which render engine was used for the game you extracted the models from, that would be a pointer. If you can't get that info I would strongly suggest asking in any of the game dev forums. We are nothing but pole barn builders here (unless some crack game dev guru show up here to answer your questions)
April 20, 2023 at 3:07 pm #1959354@mathmathou I wish I could be more help, but i'm certainly no expert as I just really started learning more deeply about this stuff the last week or so myself. But I have seen greenish and reddish normal maps before (via experimenting with the sliders settings in some of the textures softwares, for separate RGB channels). I could assume that could be the case for the normal map, but I might be (and probably am) wrong.
April 20, 2023 at 7:51 pm #1959437@mathmathou
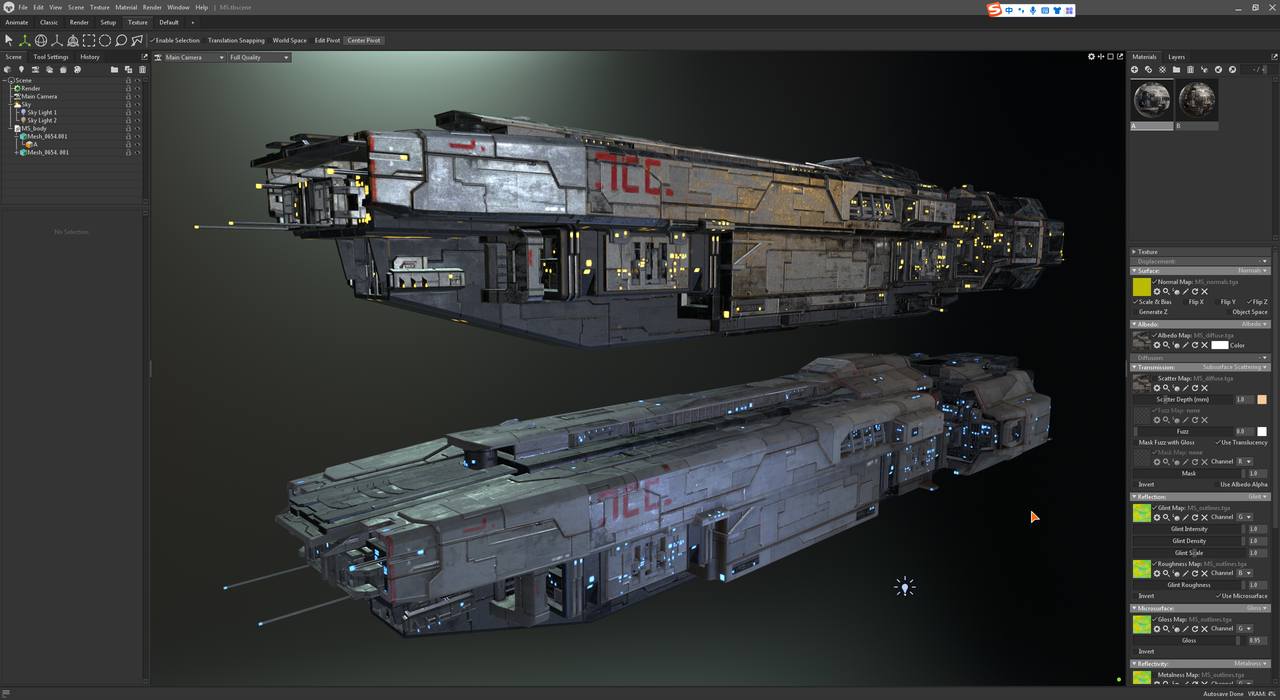
I used to play Toolbag appr. 3 years ago but at the end of the day I still love my Iray. I'm no expert but just a 3D hobbyist. Let me try to give some key findings:As for THE No.3 of FIRST TEX FILE and THIRD TEX FILE (black & white maps), I think they may go to Reflectivity - Metalness in Toolbag, like this - I took out one of my favorite boats


Or switch it to Specular to have more glossiness but the value might need to be tuned.
As for that 'bloody map', if in DS, perhaps I'll put it into SSS related slots to have some scattering effects. In Toolbag, maybe you can throw it into Transmission - Subsurface Scattering, see if there's any subtle effect change...
As for that yellowish normal map, I can show the flow in ShaderMap but I'm not able to tell the theory, too obscure...I just understood 20% maybe

Normally the blue map is generated or baked on tangent space basis:
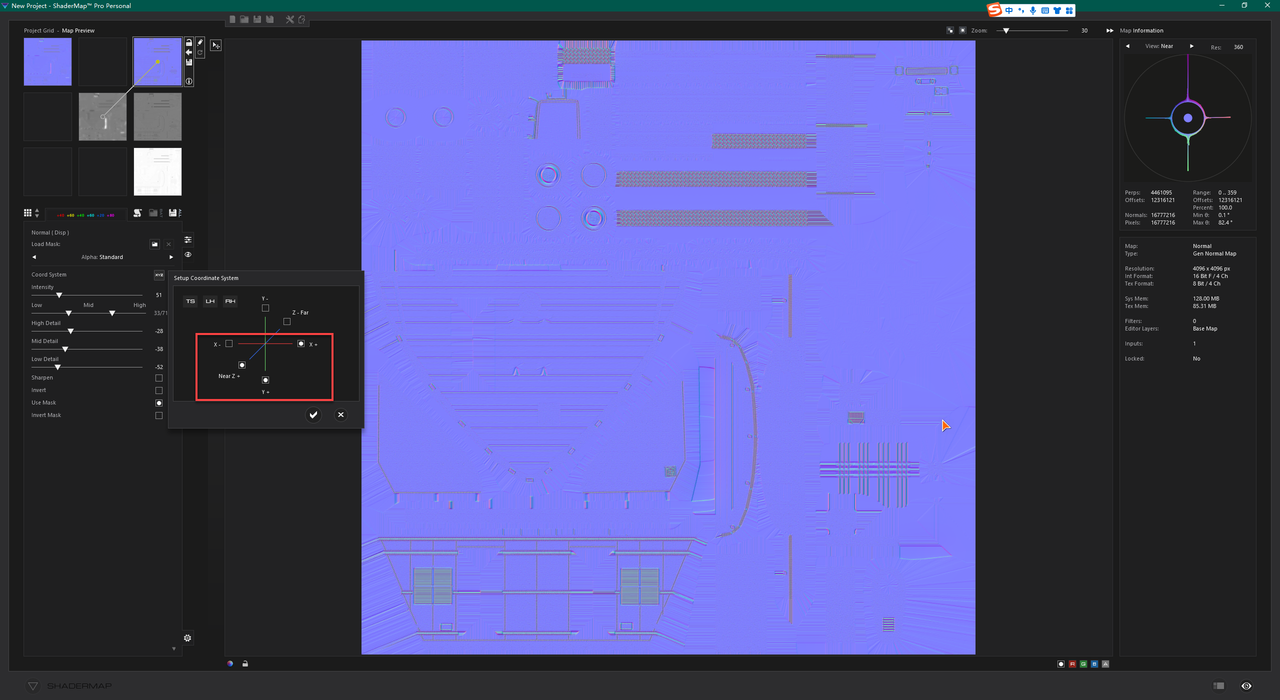
If we swap axis-Z (Normals), color will be changed accordingly, i.e. from B to R+G (Yellow):

It is said such map is often used in games. blue channel will be spared and used for saving other data... sth. like that. I've never used such a map before... just tested in Ds.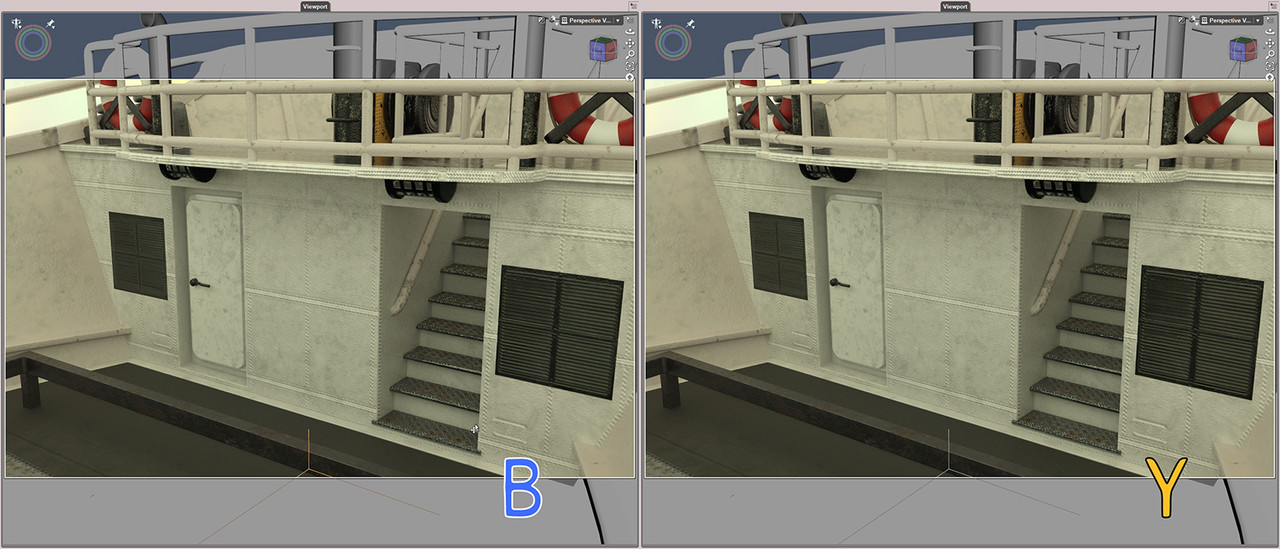
Nothing but only light / shadows have some subtle change.imo as above, just for your reference~ Have a great day!
April 21, 2023 at 4:25 am #1959512@mathmathou , Could you upload everything extracted? It depends if it's an .obj (and possible .mtl), or an fbx, or another internal game format. It could be a model geometry problem, with inverted normals in polygon slices...
Is for Iray/Daz or another engine?
I just woke up about 20 minutes ago, and I'm still in "Sumberland."April 21, 2023 at 10:09 pm #1959889Hello all and thanks you for your answers
@inversekinematics: I think we are more than just pole barn builders, but the image made me laugh. There are no dev forum, it's a mobile game available on PC and the communication around it is scarce
@gts6: you were of some help. Your post gave me the idea of mine when it should have been my first thought to ask over here
@windreaver0118: playing around with your suggestions but I might be missing some parameters to make it work noticeably. I'll keep at it. Thank you for the detailed walk-through, especially about the Z axis: details on the model looks more realistic when activated (more consistent)
@littlepleasures: I though about metallicity map as you suggest, I might be missing another parameter in Mamroset to make it "shine" more. As for the normal map, inverting the green channel did not bring back the "blue" map but inverting the axis in Mamroset gave better results as for the details on the model. Thanks
@abad: here you go : Mares Serenitatis
It's an obj file with 3 textures named "diffuse", "normals" and"outline" but that is my nomenclature of course. It's taken from a game and I'm using it in Mamroset toolbag. I suppose this could also work in any other 3D modelling/posing tool. I haven't tried in Blender or DAZ to be honest. Don't waste too much time on this though, it's not that importantThank you all for your answers and have a great week-end
April 22, 2023 at 3:10 am #1959934April 22, 2023 at 8:34 am #1960006@mathmathou , this is my test..
Indeed, the mesh had about 4000..."holes". I have sealed them with Rhinoceros7, as .obj.
For me, the diffuse is clear. I've used your "normal" as Bump, and your "outlines" as Normal. I've converted the .tga to .jpg at http://www.Compress-or-die.com: They can't be edited in Photoshop..., but they can be edited in Gimp... The .tga don't have any alpha transparency, just channels.
When opening the .duf, it will ask you for the path of the textures. Locate "diffuse.jpg", and the others are already taken.
Play around with the "Metallicy" parameter on Surfaces/Base as well as "Metallic Flakes". (Maybe my duf looks too "killer"... )
Regarding the "lights" of the ship, I have separated them from the Normals.tga channel..., as "Emission color". Modify its temperature and luminance to your liking...
All this thought for Iray/Daz.
Have fun!
https://www.mediafire.com/file/p0t5e4lz390kicm/Mares_Serenitatis_DAZ.zip/fileApril 22, 2023 at 10:18 am #1960078@mathmathou DS version ~
I used PS to split the channels since Daz doesn't fully support tga format. There was nearly no change for 'maps to slots', normal for normal, bump for bump etc.
 still not optimal but just for fun~
Toolbag proj + Daz:
https://mega.nz/file/KboTRTwD#y_zfk22bD-VakCH9z8ioO9IFLVKSbnOkX4qScxx6WnoApril 22, 2023 at 10:58 am #1960093
@windreaver0118 , goob job!... (I dont put a background and lights, but... If I try to send to Maya (the bridge..), convert material to Arnold, dont work well.
This is not a competition, but an exchange of ideas.April 22, 2023 at 11:09 am #1960095Richard model to Arnold render engine:

Abad model to Arnold.. April 22, 2023 at 11:19 am #1960098
@abad No no, it's not, as I said it's just for fun my friend ~ I just loaded one of my render settings in space.. nothing special

TBH, I know nothing about Arnold, render engine varies...seems it'll take more time to configure the paramemters? I didn't touch the model but just imported obj to Daz / Toolbag ~
April 23, 2023 at 12:52 pm #1960597@windreaver0118 and @abad
Wow guys, that is awesome! Thank you for all the work you put into that! And thank you for the files already setup for DAZ and Marmoset, I now have a true vision of what you did and how you achieved your great results.
Thanks a gazillion time and have a great Sunday
April 23, 2023 at 1:05 pm #1960605@mathmathou You're welcome, and THANK you! Have fun!
April 24, 2023 at 6:09 am #1960868There is no reason to thank. We also learn: I have never seen RGB channels used for a model.
I guess they are tricks from video game programmers... -
AuthorPosts

- You must be logged in to reply to this topic.
